
I hope this helps someone in the knitting world. Enjoy!
Butterfly Stitch "in the round" Tutorial. Here is the pattern portion of it
For rounds 1, 3, 5, 7, and 9
*Starting at marker, bring yarn to front of work. With working yarn in front, slip 5 stitches purlwise. Bring yarn to back of work. Knit 5 stitches. Repeat from * to end
For rounds 2, 4, 6, and 8 Knit
Round 10
Knit 2, *knit the loose strands and the next stitch together, knit 7. Repeat from * to last 7 stitches, k7.
For rounds 11, 13, 15, 17, and 19
*Knit 5, bring yarn to front of work. With working yarn in front, slip 5 stitches purlwise. Bring yarn to back of work. Repeat from * to end
For rounds 12, 14, 16, and 18 Knit
Round 20
Knit 7, knit the loose strands and the next stitch together, *k9, knit the loose strands and the next stitch together. Repeat from * to last 2 stitches, k2
And the picture tutorial:
Make sure you have enough stitches on your needles to be divisible by 10. PM and join your knitting.
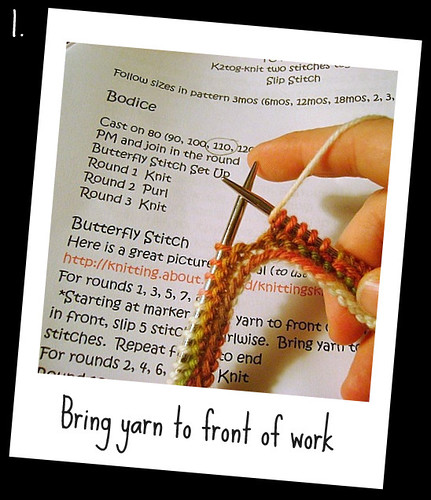
1. After you place your marker, bring your working yarn forward as if you were going to purl-but don't purl.

2. Slip the next 5 stitches "purlwise" and "wrap" your yarn around those stitches by bringing your yarn to the back of your work as if you were going to knit.
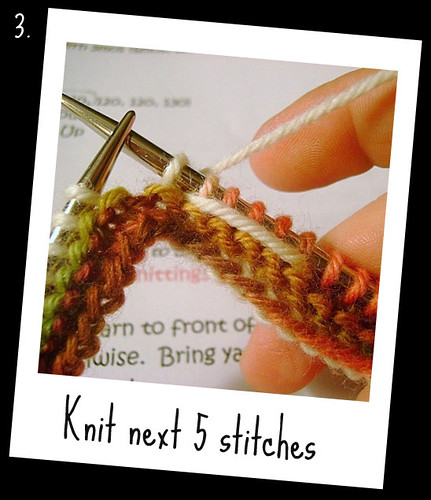
3. Knit the next 5 stitches. In the picture, I've shown only the next stitch knit, but knit 5 :)
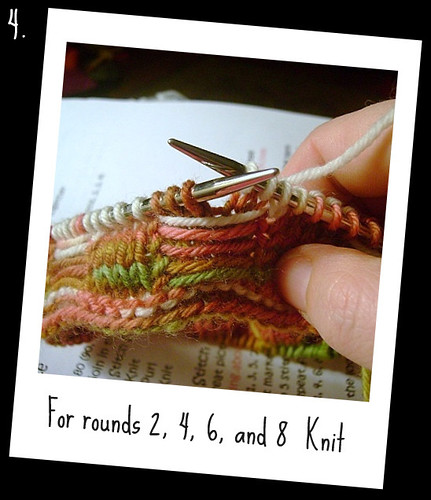
4. You will be knitting every other round
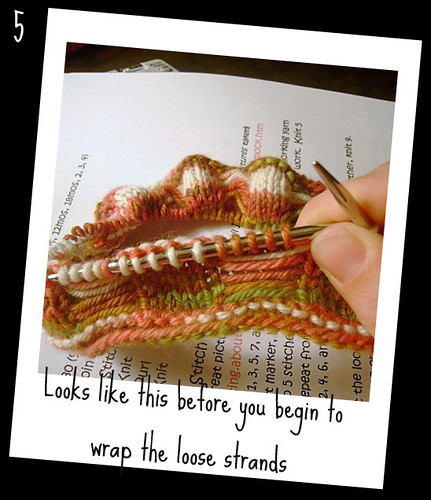
5. This is what it will look like before you begin to butterfly your loose strands.
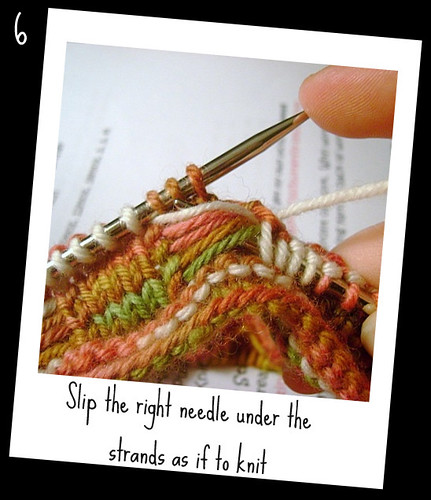
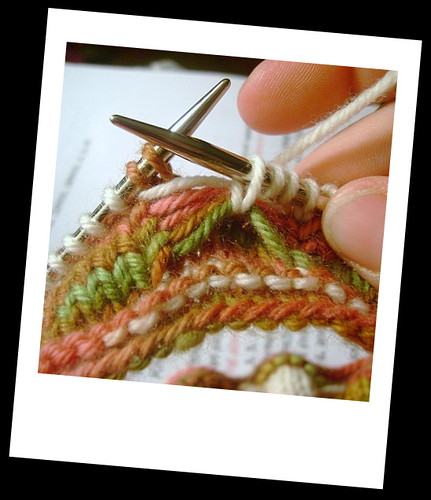
6. Take your right needle and insert it under the loose strands as if to knit
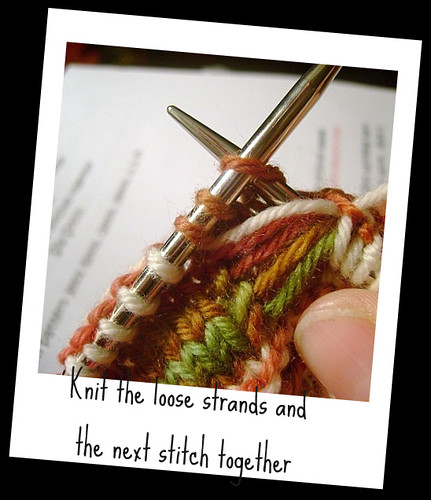
7. And insert the right needle into the next stitch to knit it and the strands together
(I started to get lazy....I stopped numbering my pictures!)
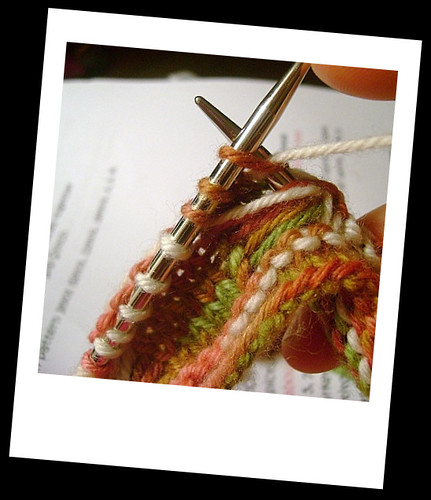
8. Wrap the stitch to knit it
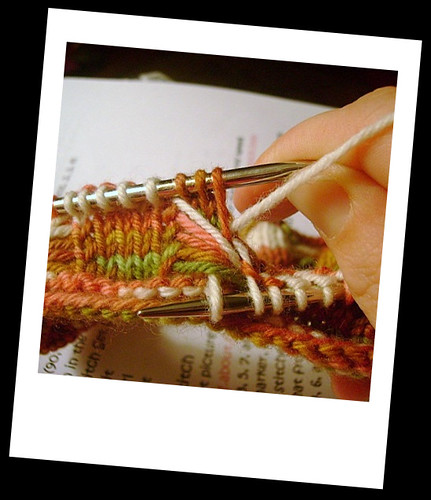
9. (it gets tricky here) Bring your needle with the new stitch on it (the right needle) back down through the loose strands and slip the stitch on the left needle off. If you don't slip that stitch off the left needle, you'll be creating an extra stitch.
10. When you bring your right needle back up, it'll have that beautiful little stitch on it!
See how pretty it is?

This is perfect! Just what I was looking for and so helpful.
ReplyDeleteWhen I get my project done, I'll be sure to link back to this tutorial on my Rav notes.
Excelent tutorial. You have shown the steps in excuisite detail. I recently saw another tutorial that left me as confused as before I read through it. You have shown everything the other tutorial didn't, exactly how the stitch is done. I had no idea the yarn was carried over all the slipped stitches. The most important part and it wasn't shown in the earlier tutorial. Your use of variegated yarn helps to show the different parts of the stitch and allows you to distinguish the steps more easily. Great job! Thank you.
ReplyDeleteThanks so much. This is exactly what I was looking for. You are right there is not much out there on how to do this.
ReplyDeleteThank you so much for this tutorial. I wanted to use this stitch for a pair of socks - and now, thanks to you, I can!
ReplyDeleteThank you for the ITR tutorial and pictures. I have a hat pattern that calls for this stitch and the pattern is VERY unclear as to how to work the stitches in the middle of "the Butterfly" - it calls for 2 sts in the middle of the running strands. I was lost until I found your blog! Thank you again.
ReplyDeleteWoah! I'm really loving the template/theme of this website.
ReplyDeleteIt's simple, yet effective. A lot of times it's difficult to
get that "perfect balance" between user friendliness and visual
appeal. I must say that you've done a amazing job with
this. Additionally, the blog loads super fast for me on Safari.
Superb Blog!
my blog post - How To Get My Ex Back
Thank you so much for this! I have a pattern that (I can now tell) describes the stitch in words pretty decently, but pictures make all the difference. I couldn't ask for better photos and explanations than these! :)
ReplyDelete